Canva tutorial · UK
How to add bleed in Canva
A 5-step walkthrough for setting up 3mm print bleed and exporting a print-ready PDF that your printer will actually love.
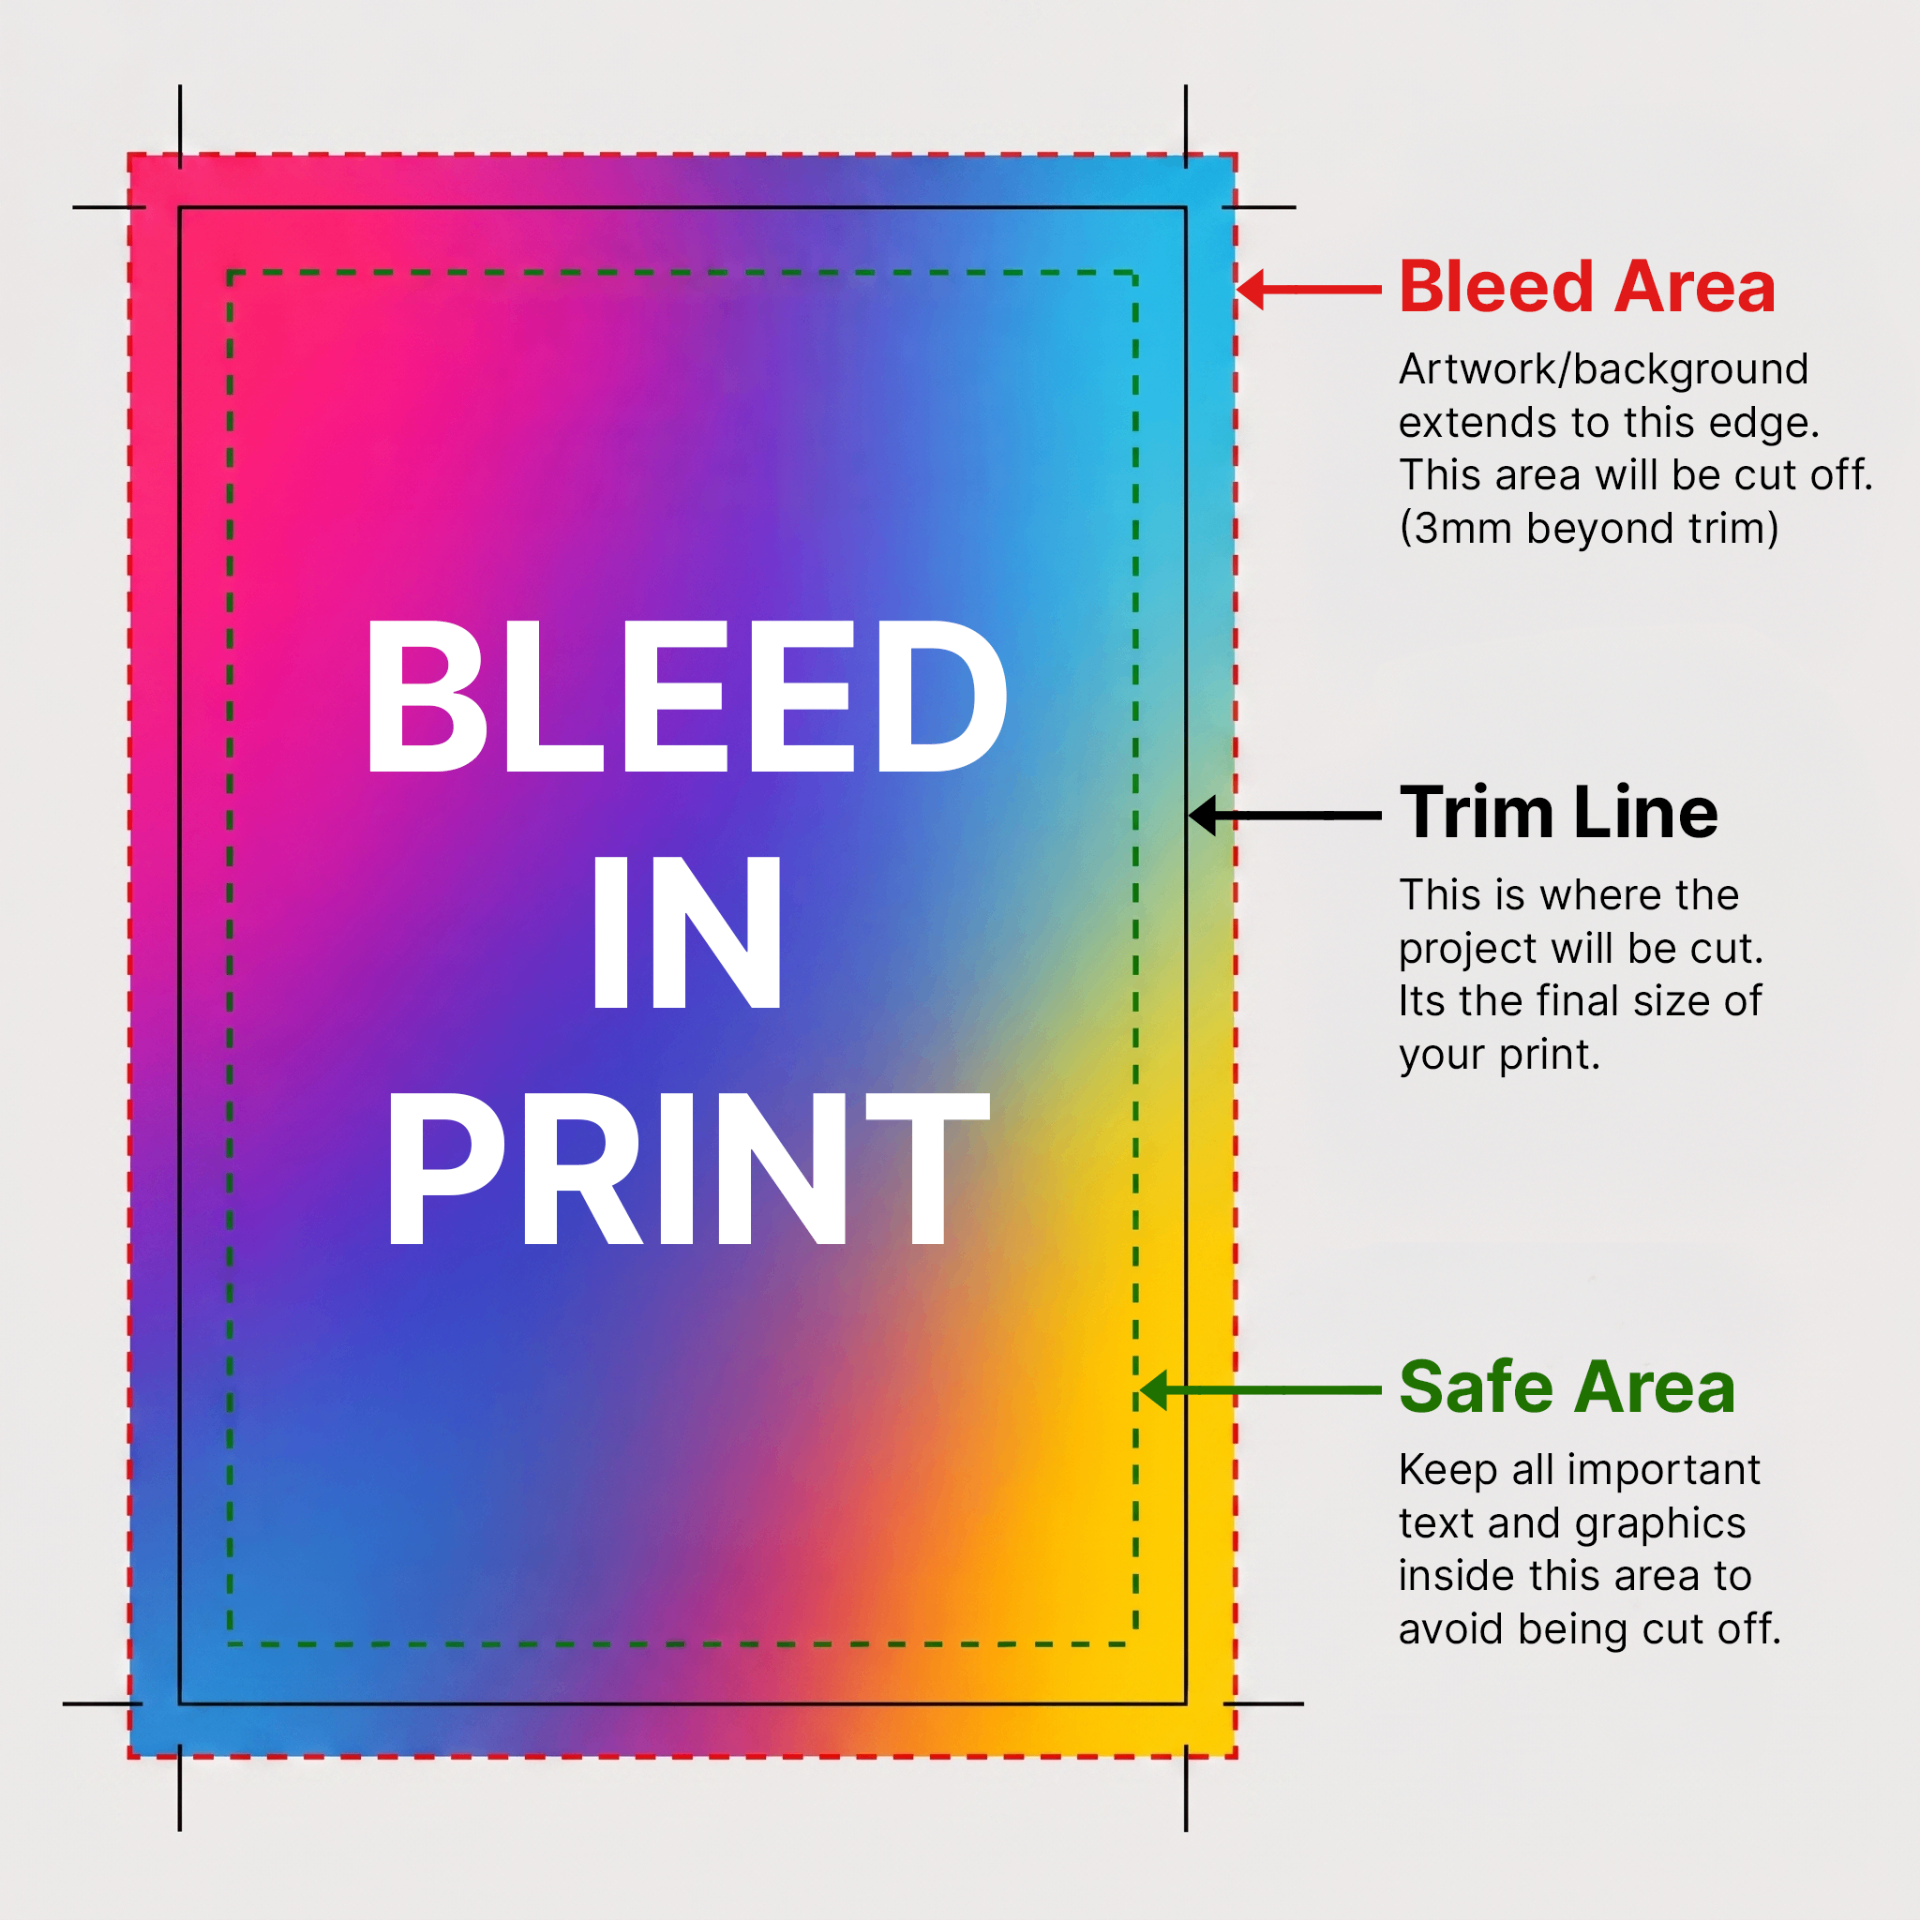
Why does bleed matter?
Commercial printers print onto oversized paper and then slice it down to the finished size with a guillotine. The blade can shift by a fraction of a millimetre, so we add a 3mm safety margin (the bleed) around every edge. Without it, one tiny wobble of the blade leaves you with an ugly white sliver along the edge of your finished print.
Step 1 of 5
Turn on the bleed visualiser
Open your design in Canva and switch on the bleed guides so you can see where that extra 3mm sits.
- Click File in the top-left menu bar.
- Hover over Settings.
- Click Show print bleed.
Tip: while you're in that menu, also tick Show rulers and guides and Show margins to keep your layout neatly aligned.
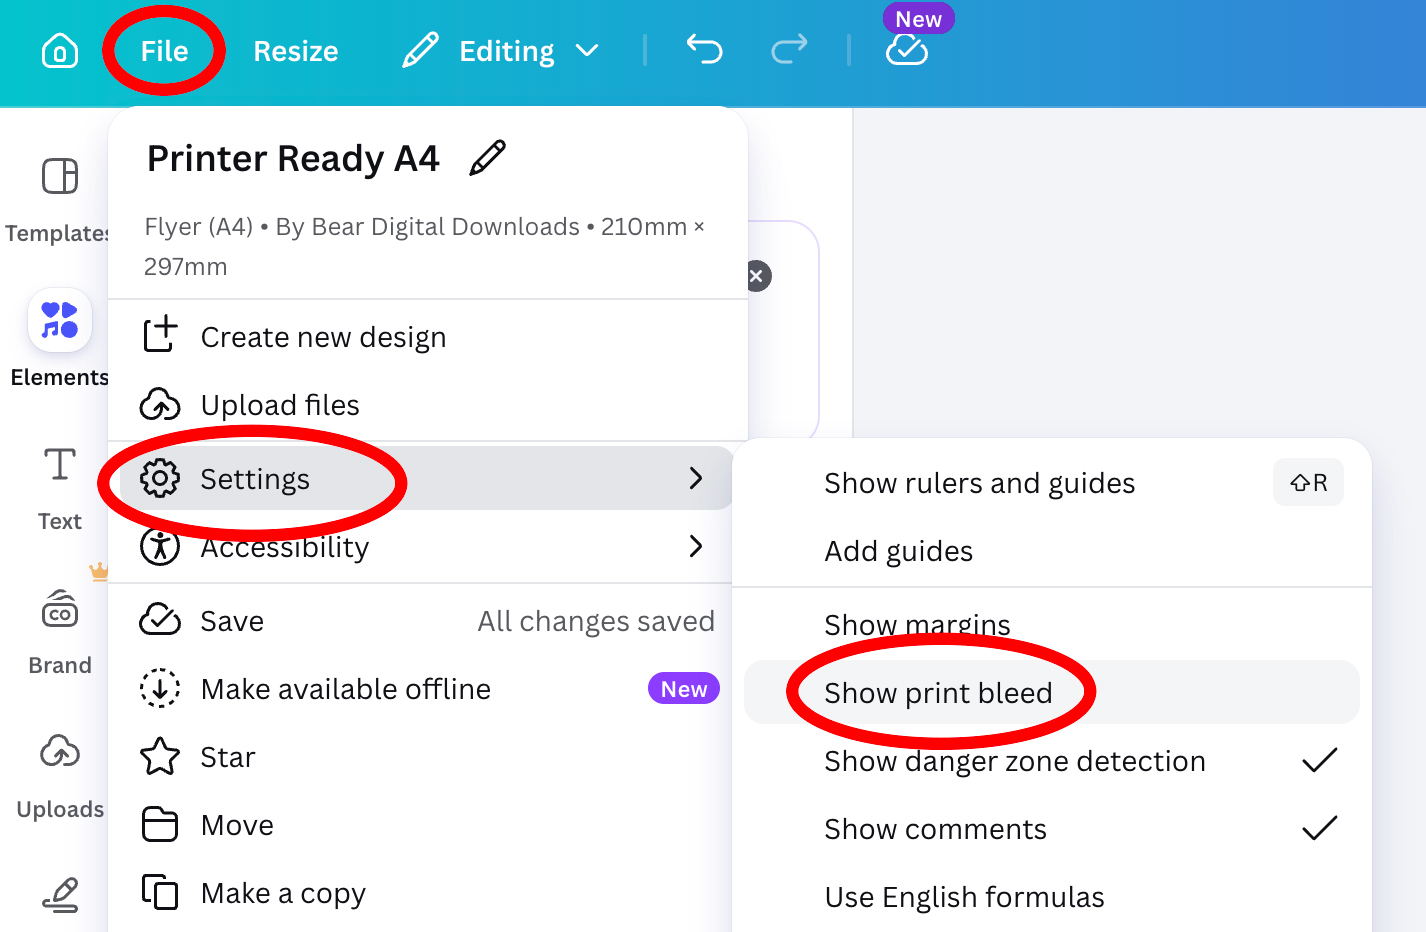
File → Settings → Show print bleed Step 2 of 5
Understand the trim line and the bleed area
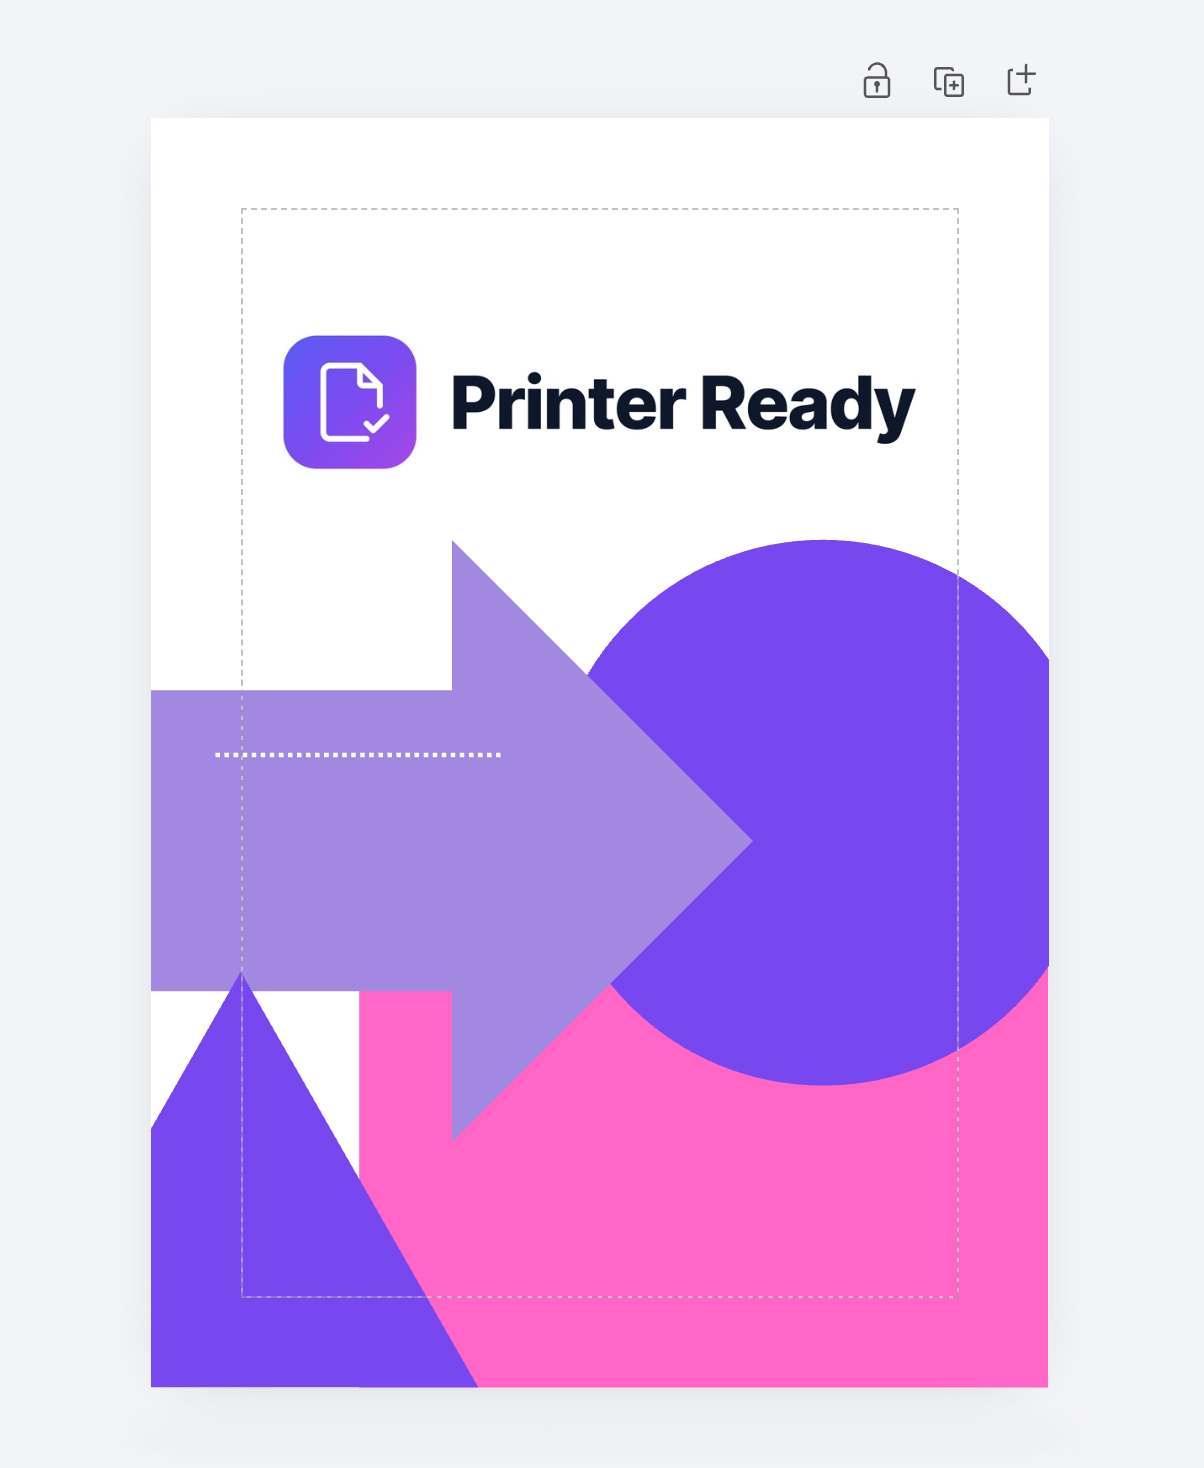
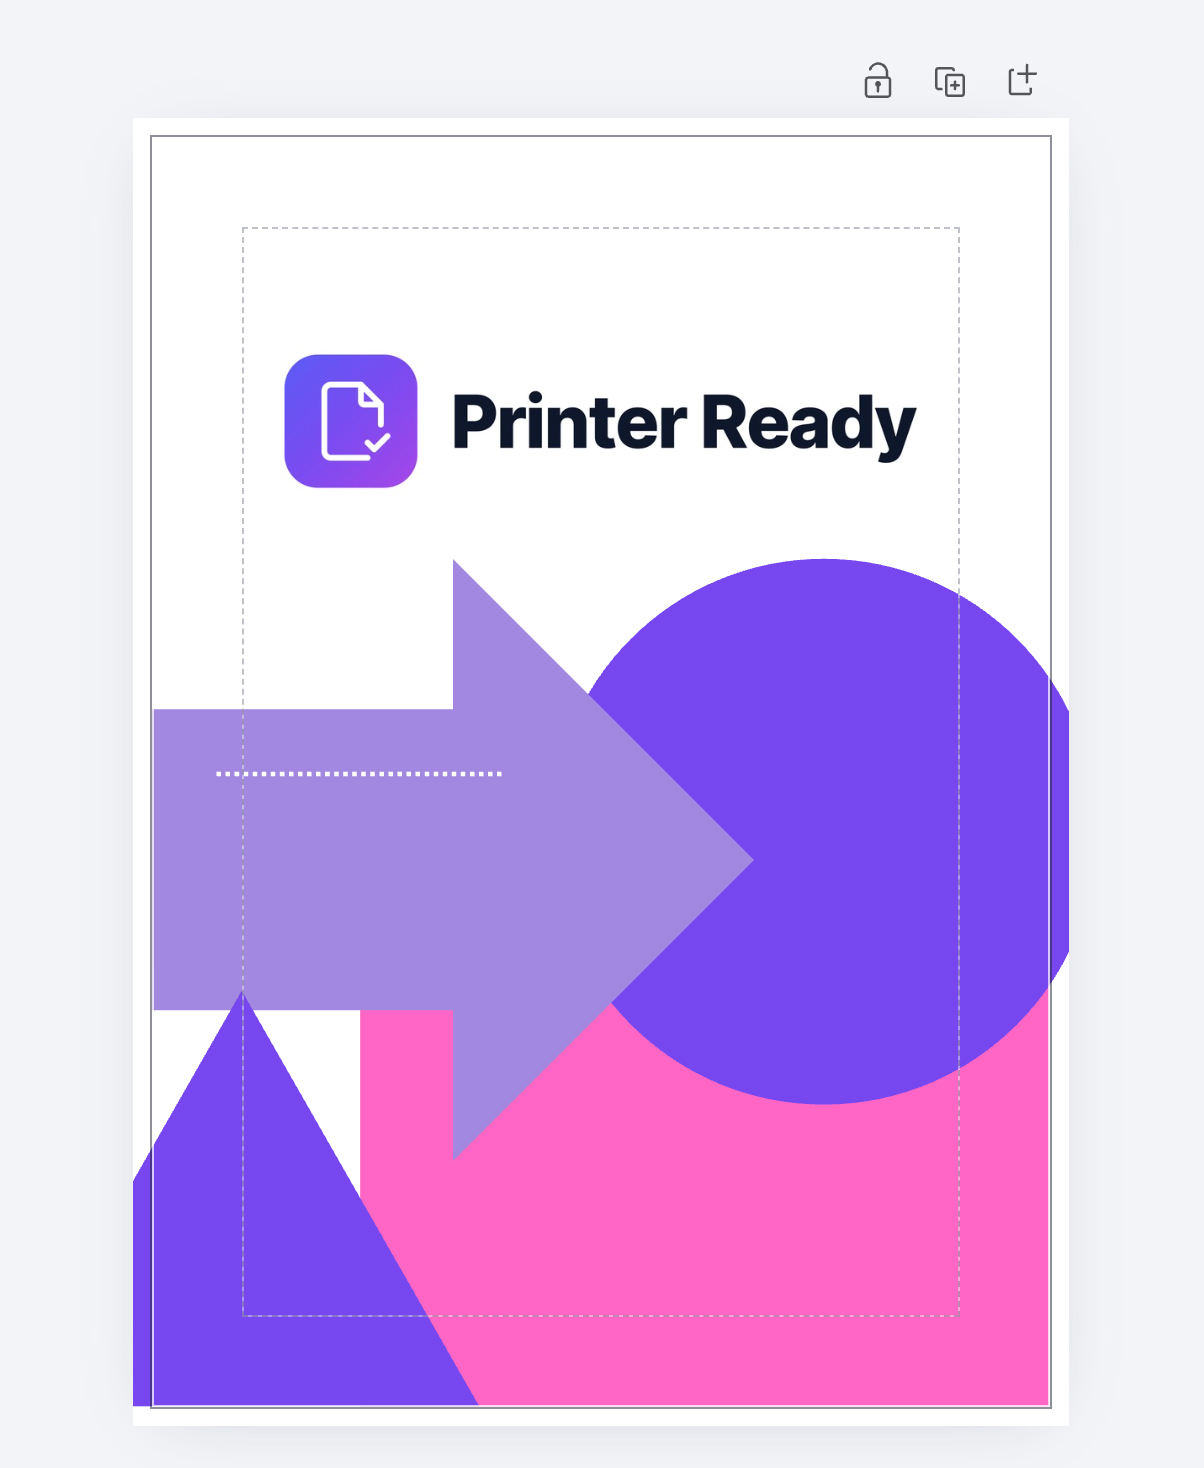
Once switched on, a solid grey line appears around the edge of your canvas showing the page trim edge. The extra 3mm beyond that line is the bleed area.
- Trim line — the solid grey line at the edge of your finished page. This is exactly where the guillotine intends to cut.
- Bleed area — the extra 3mm outside the grey trim line. Think of it as a safety buffer that gets sliced off.
Before
After
With bleed switched on, the solid grey line marks the trim edge and the 3mm beyond it is the bleed safety area. Step 3 of 5
Stretch backgrounds all the way to the edge
This is the step most people miss. If a background image or colour is meant to reach the edge of the finished product, it must extend past the solid grey trim line, all the way to the outer edge of the canvas.
Rule of thumb: if any colour or image touches the edge of the finished piece, drag it out past the solid grey trim line.
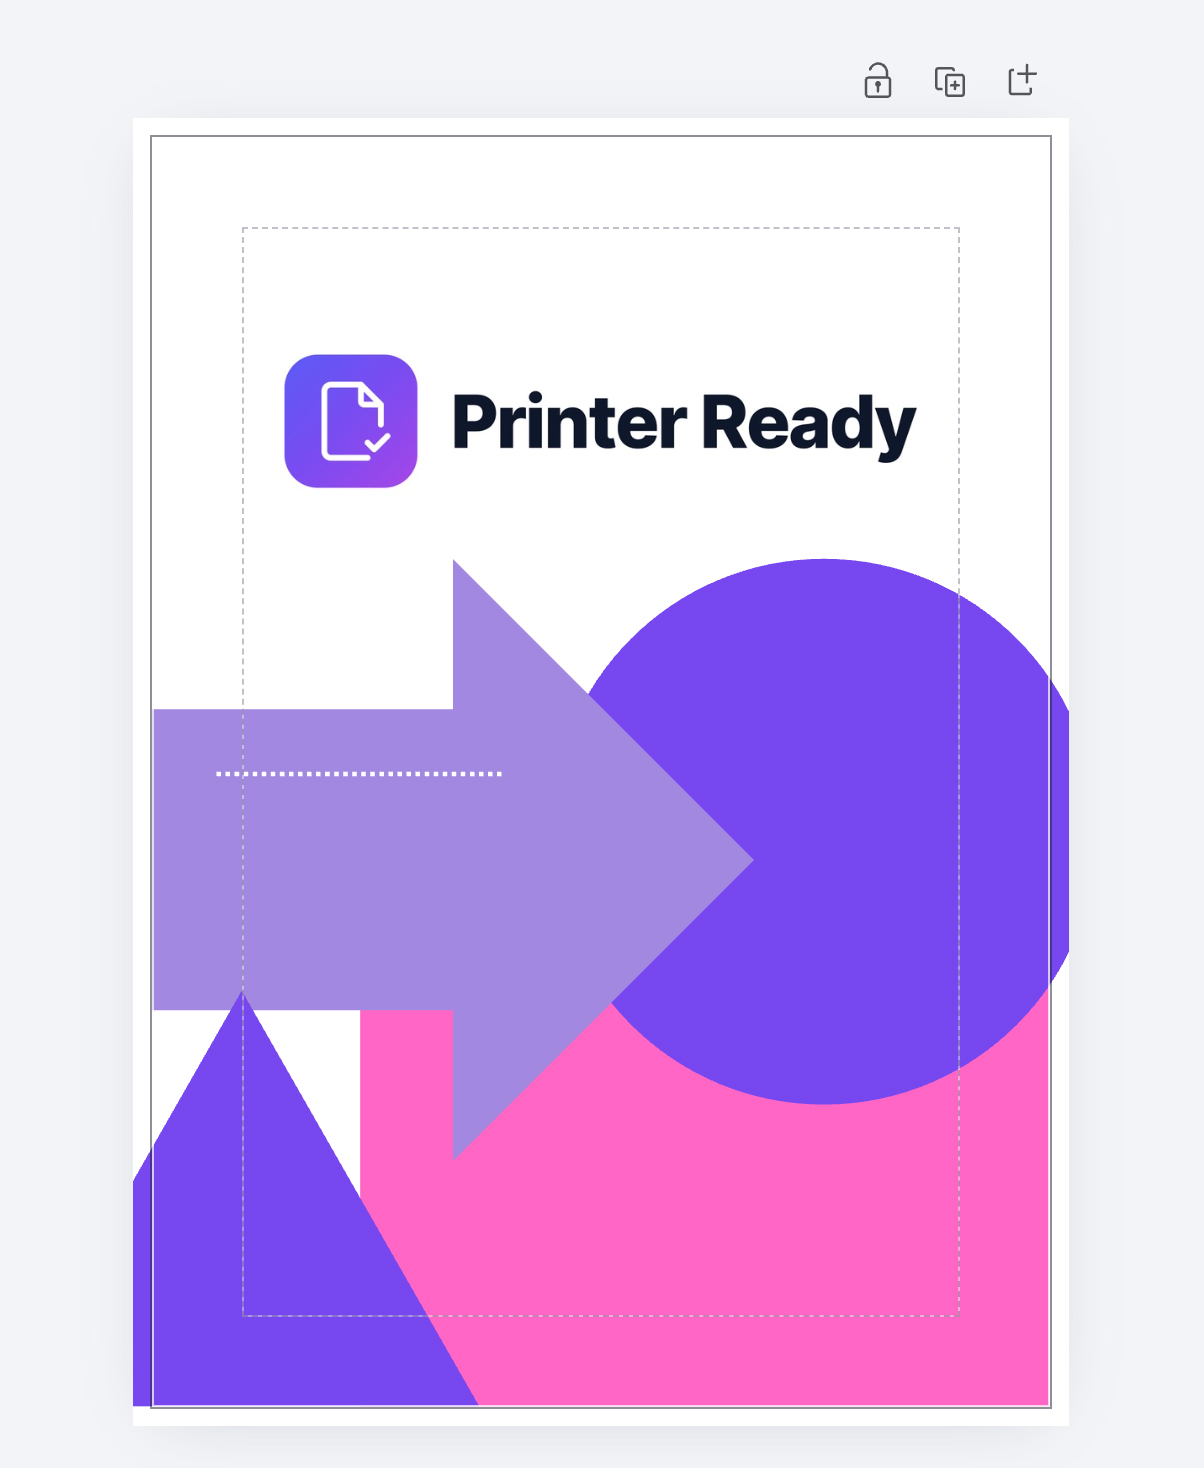
Before
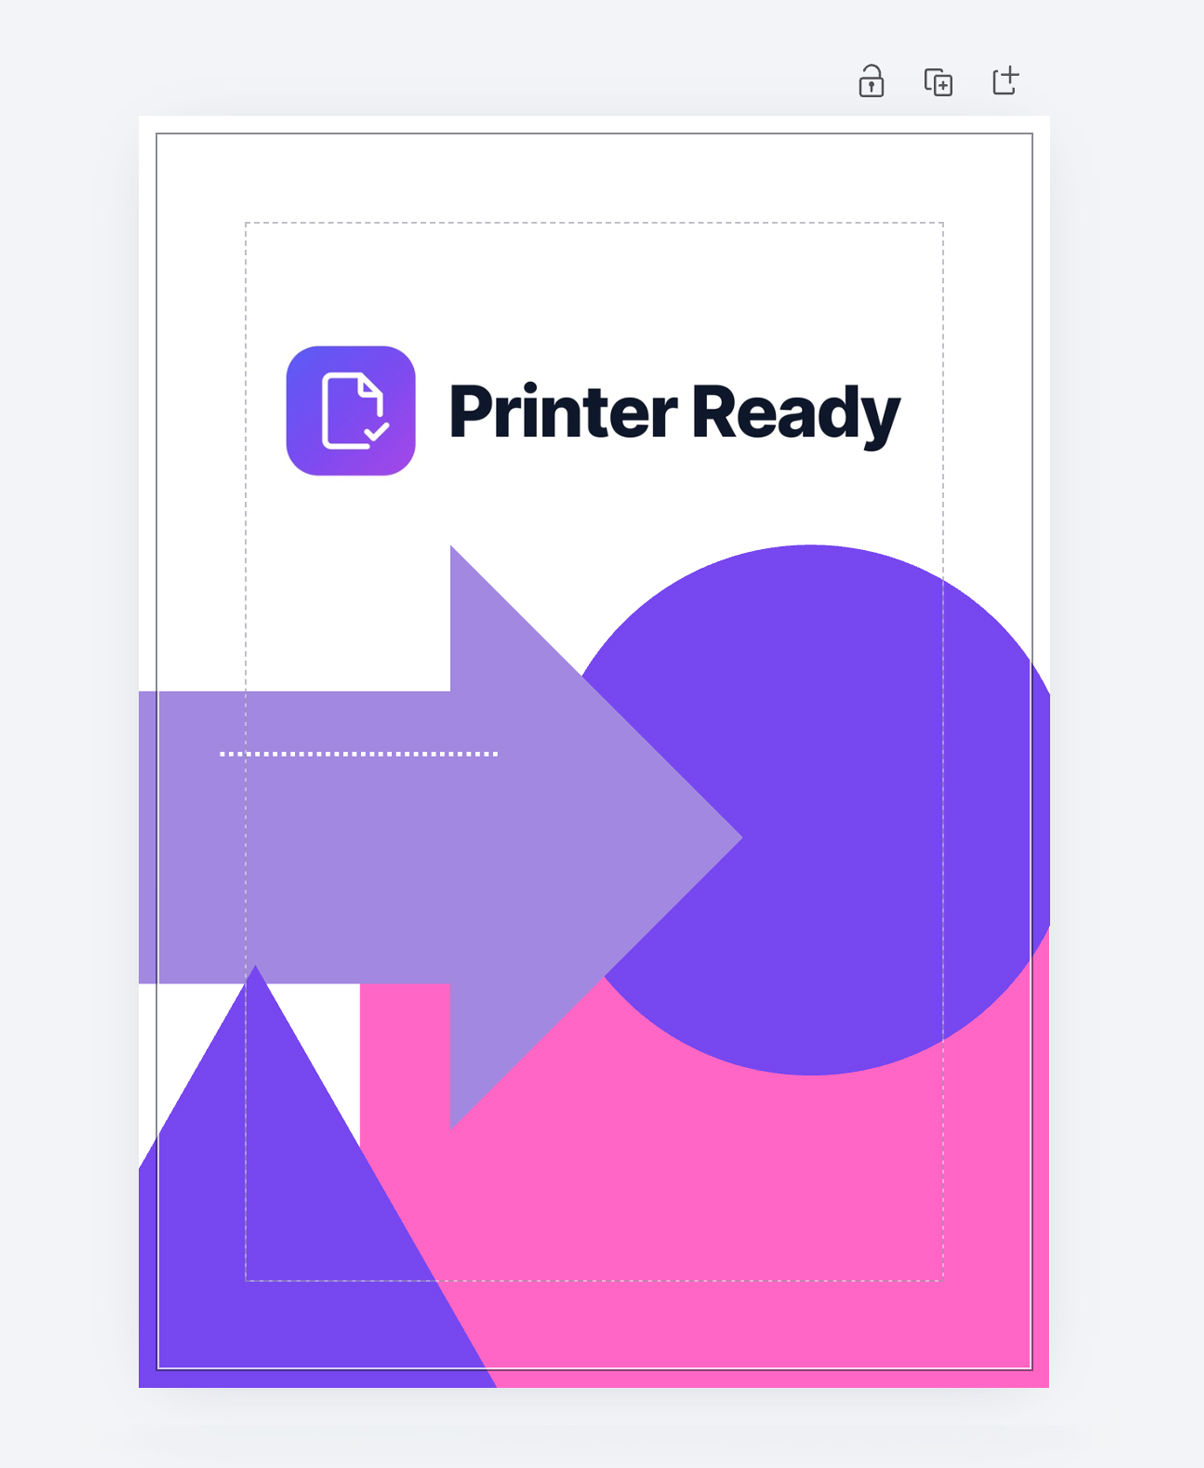
After

Zoomed in — before
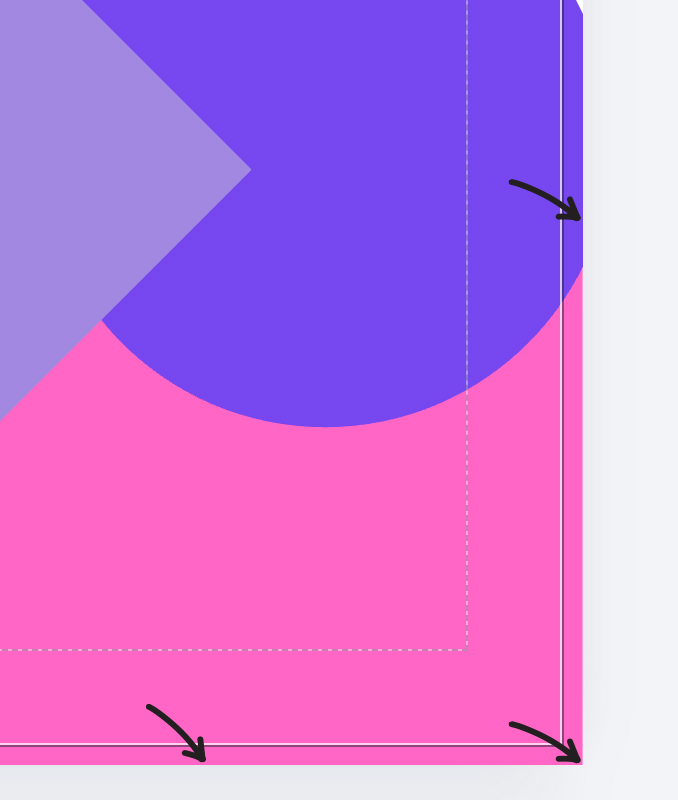
Zoomed in — after
Notice how the pink, purple and circle shapes now push past the grey trim line into the bleed area — no more white slivers if the guillotine cut drifts. Step 4 of 5
Keep key content safely inside
Backgrounds spill outwards; important content stays tucked inwards. Keep text, contact details, page numbers and logos at least a finger's width (about 3–5mm) inside the solid grey trim line.
Canva's Show danger zone detection feature (under File → Settings) shades the outer edge of the page red so you can spot risky content at a glance. If any text falls inside the red band, move it further inward.
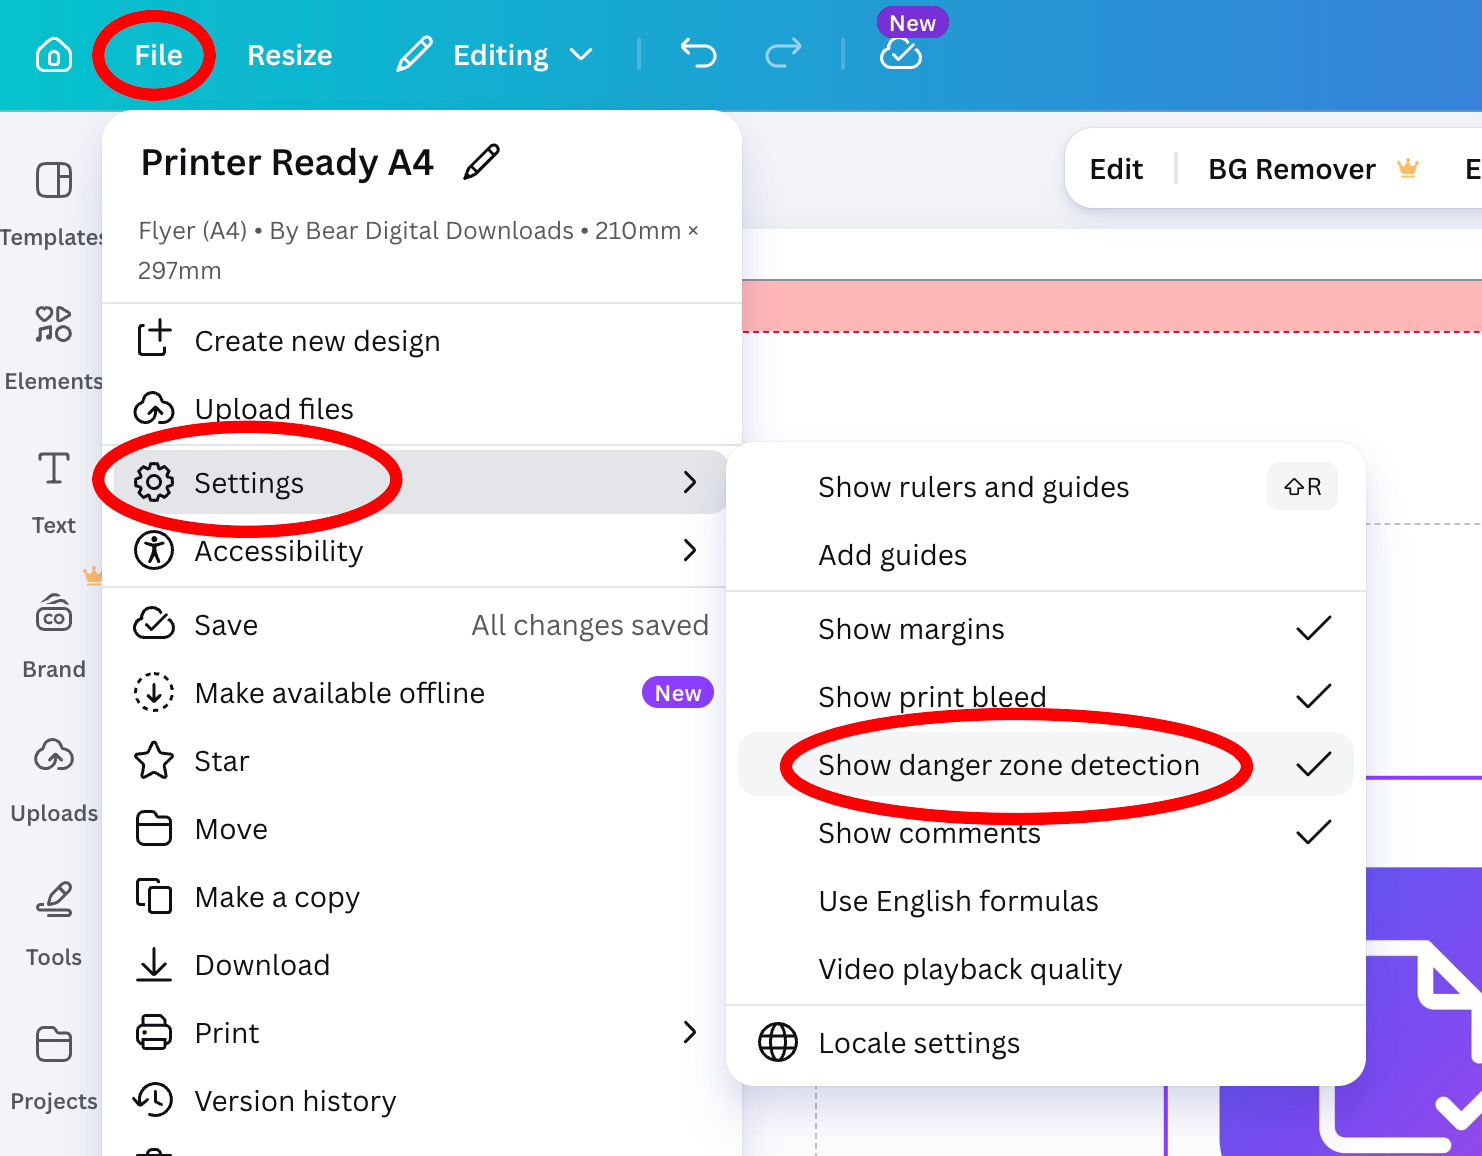
File → Settings → Show danger zone detection 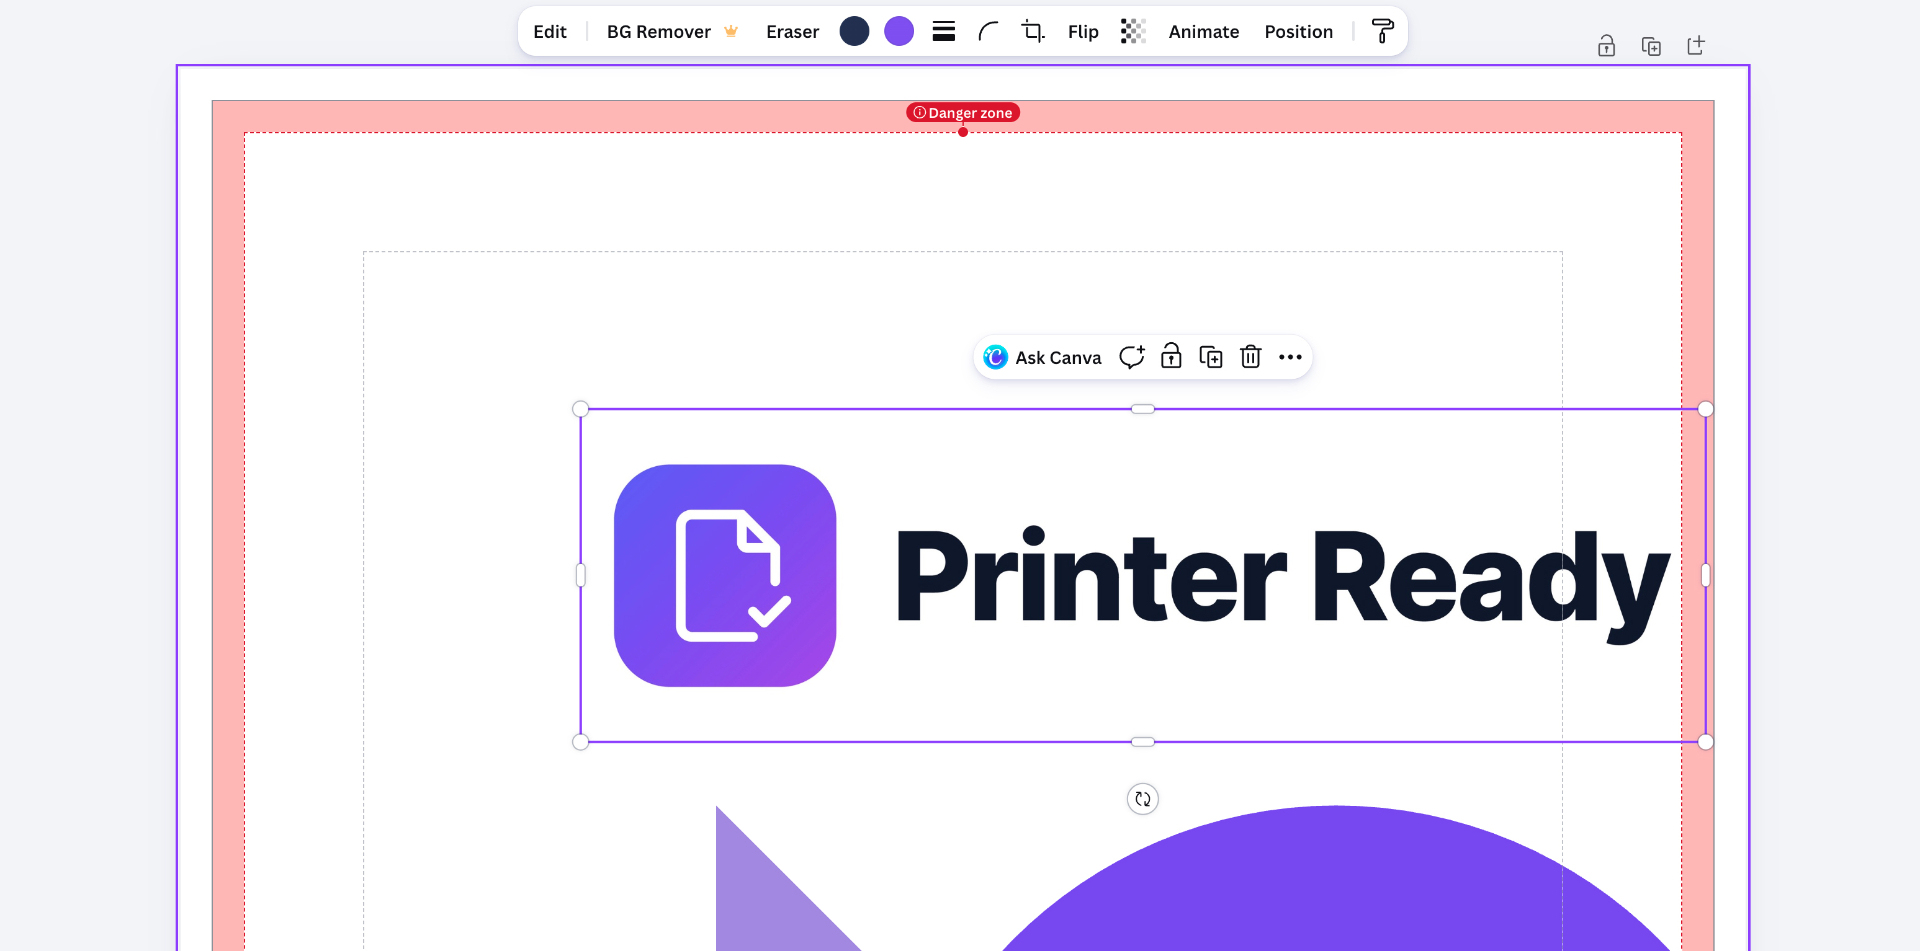
The red band is Canva's danger zone — keep text and logos well inside it. Step 5 of 5
Export as a print-ready PDF
When you're done designing, export the file so the printer actually receives the bleed data:
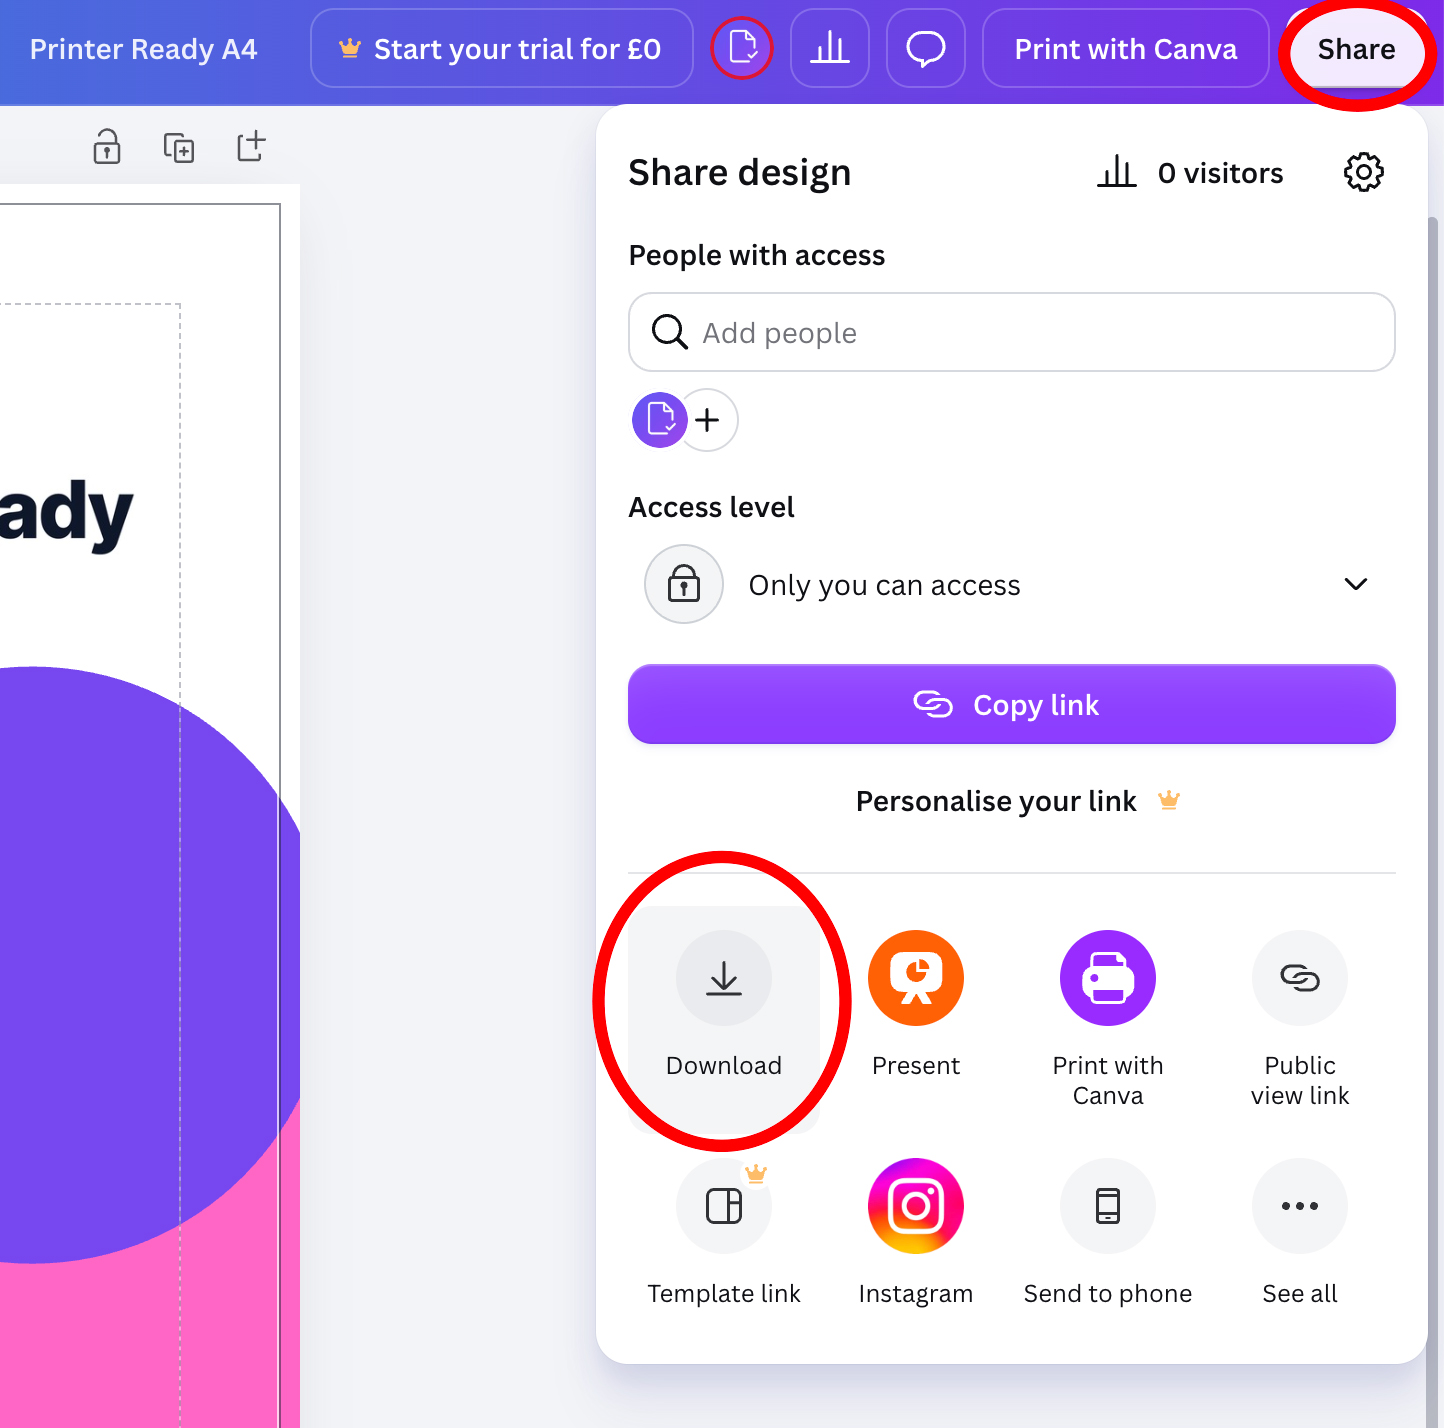
- Click Share in the top right, then select Download.
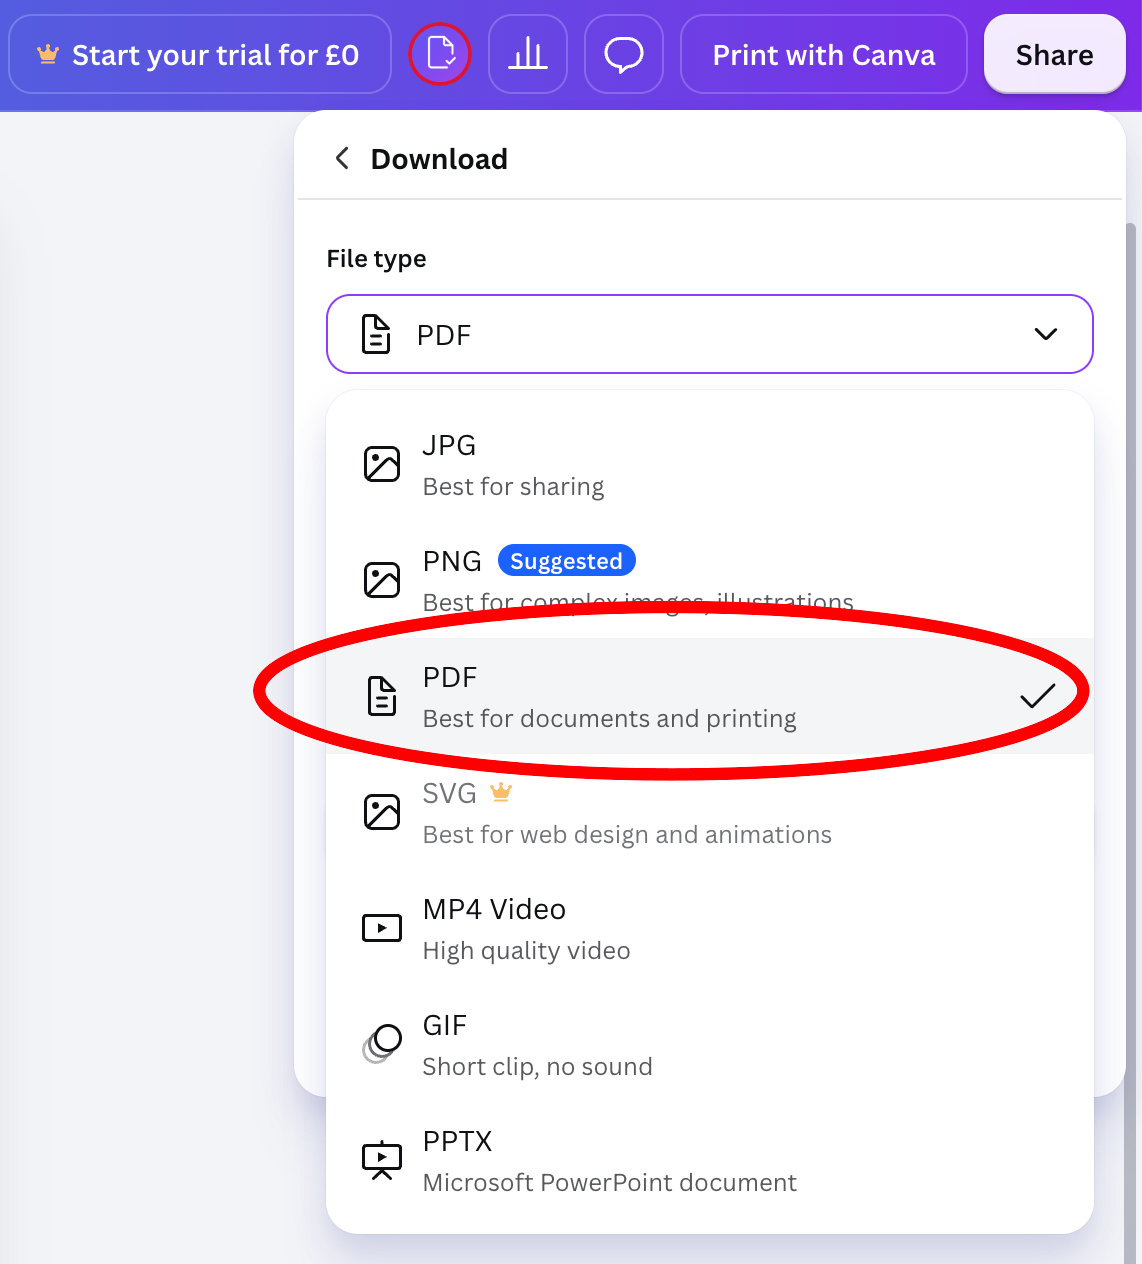
- Change the file type to PDF.
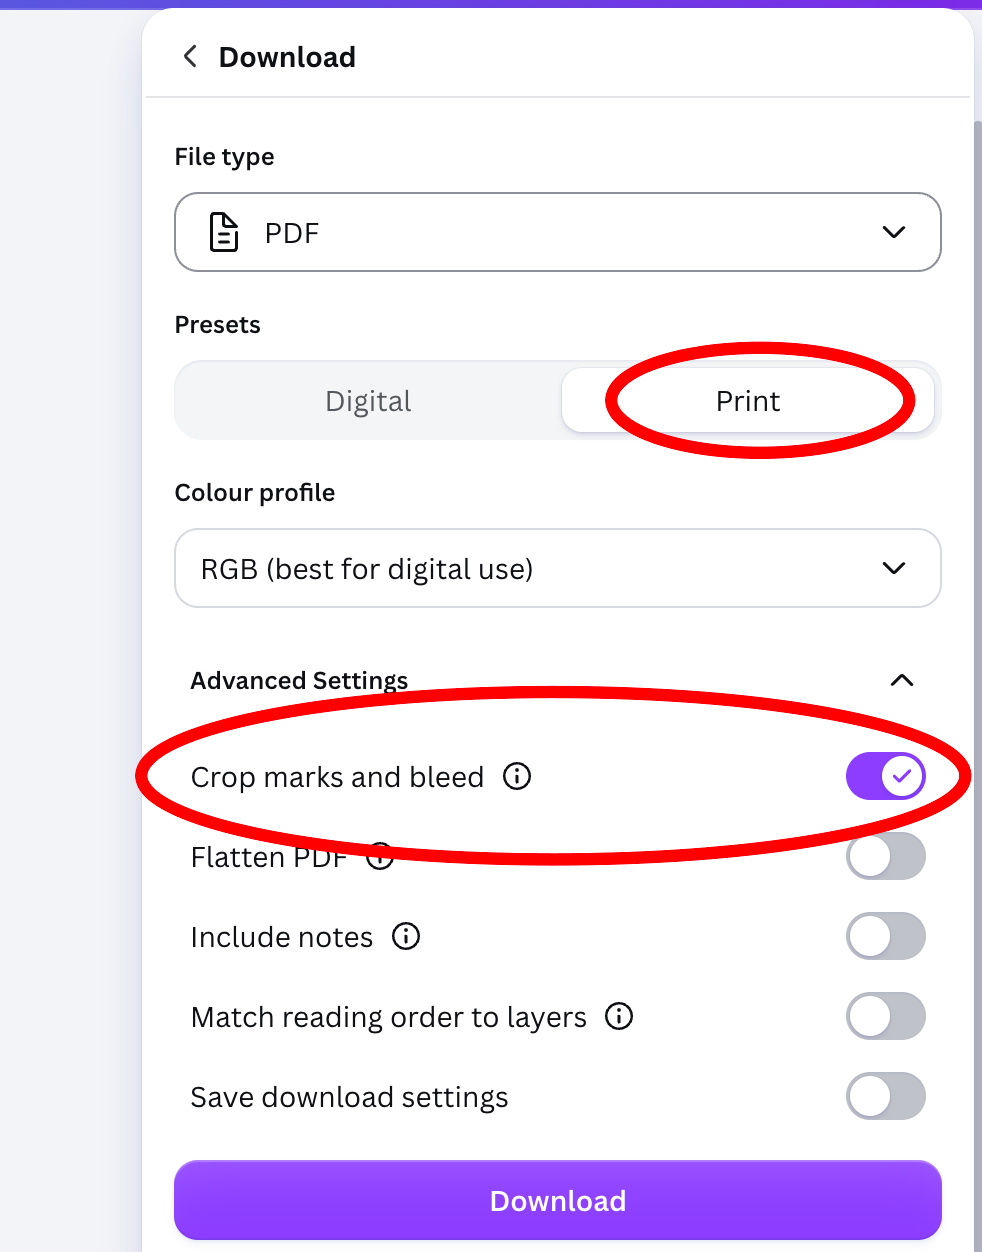
- Under Presets choose Print, then open Advanced Settings and tick Crop marks and bleed.
- If you have Canva Pro, set the Colour profile to CMYK — the UK print standard.
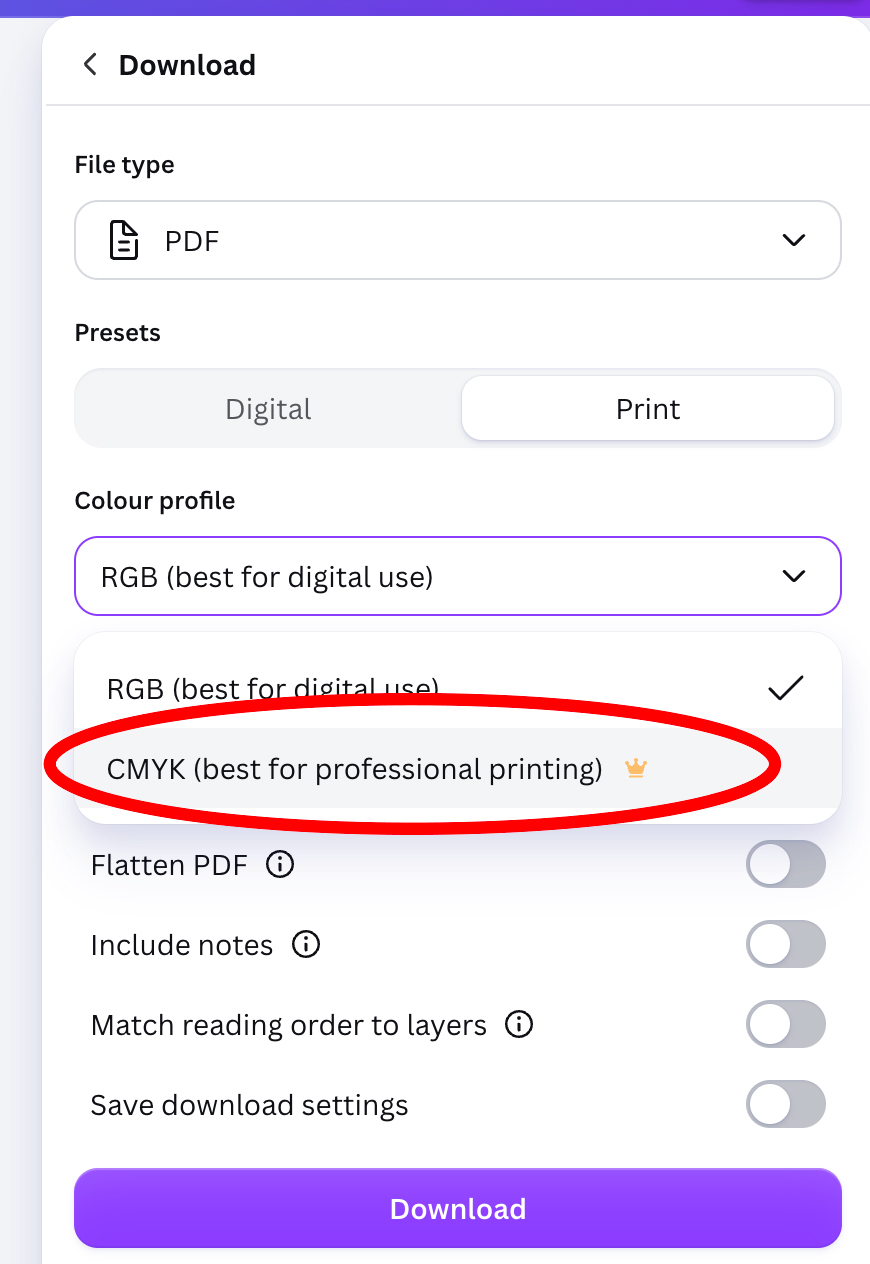
No Canva Pro? No problem — export in RGB and run your PDF through our check. We'll convert it to CMYK for you automatically.
- Click Download.

Your PDF will now include little black corner marks (crop marks) and 3mm of extended background on every side — everything a printer needs for a clean, flawless edge.
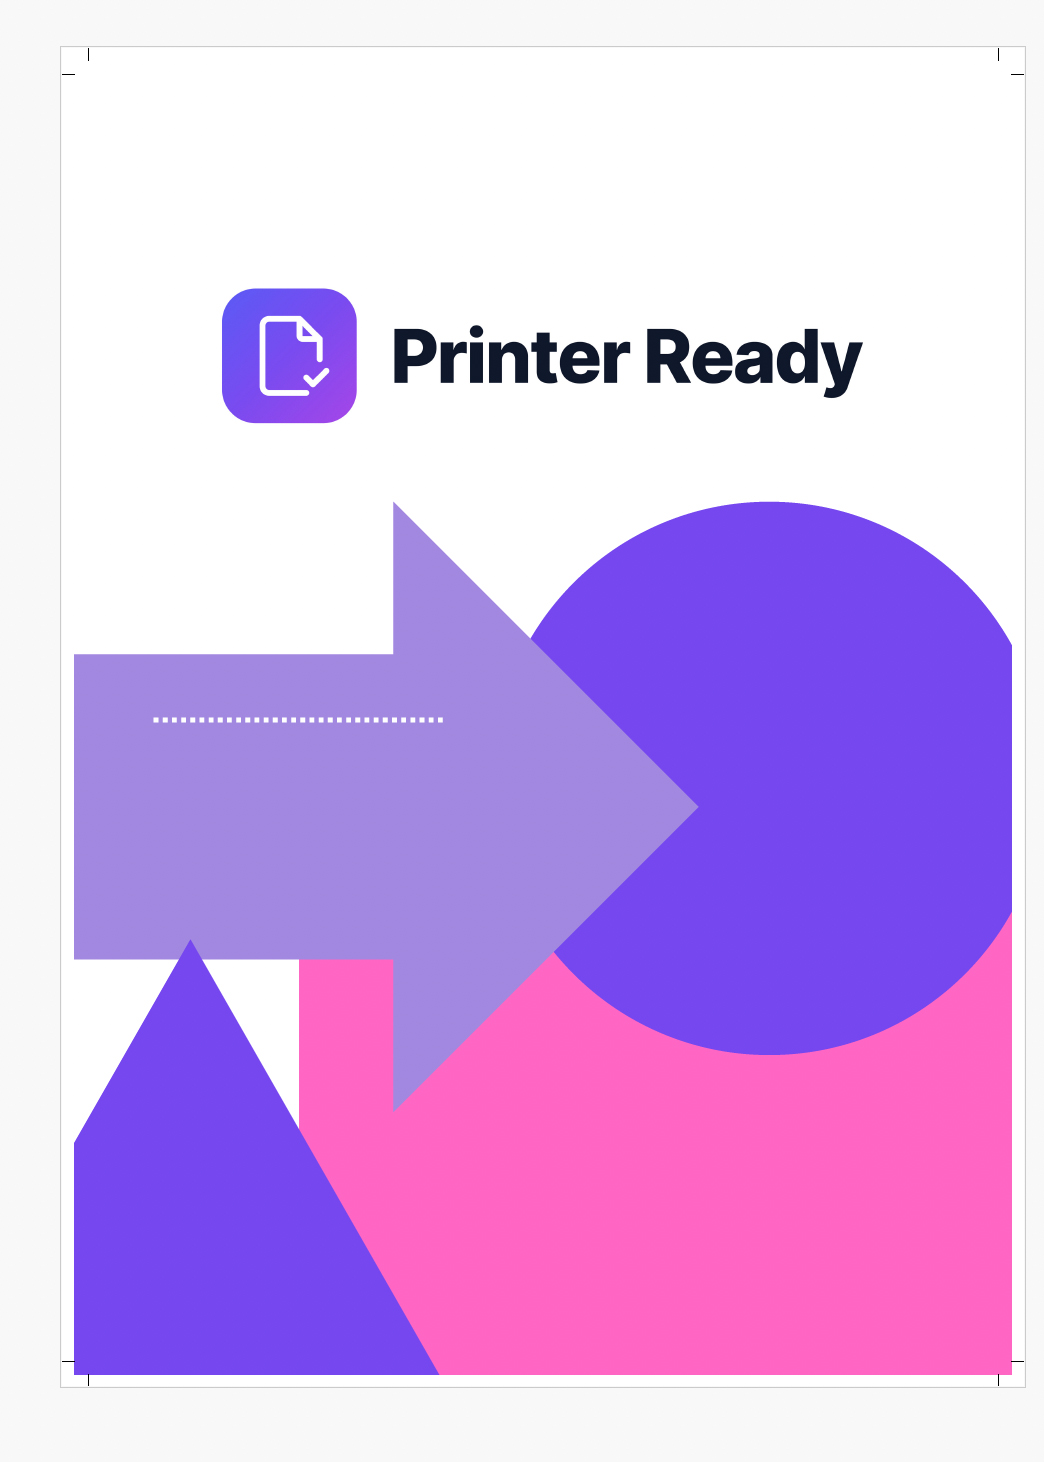
The exported PDF — crop marks in every corner and the design extending into the bleed area. - Click Share in the top right, then select Download.
Already exported without bleed?
You don't have to redo the design. Upload your PDF and add 3mm bleed automatically.
Add bleed to a PDFNot sure your PDF got it right?
Upload your exported PDF and we'll double-check the bleed, colour mode, resolution and embedded fonts in seconds — and auto-fix anything we can.
Check my PDF